In this article we will go over how to Dispatch a New Issue using the New Action feature.
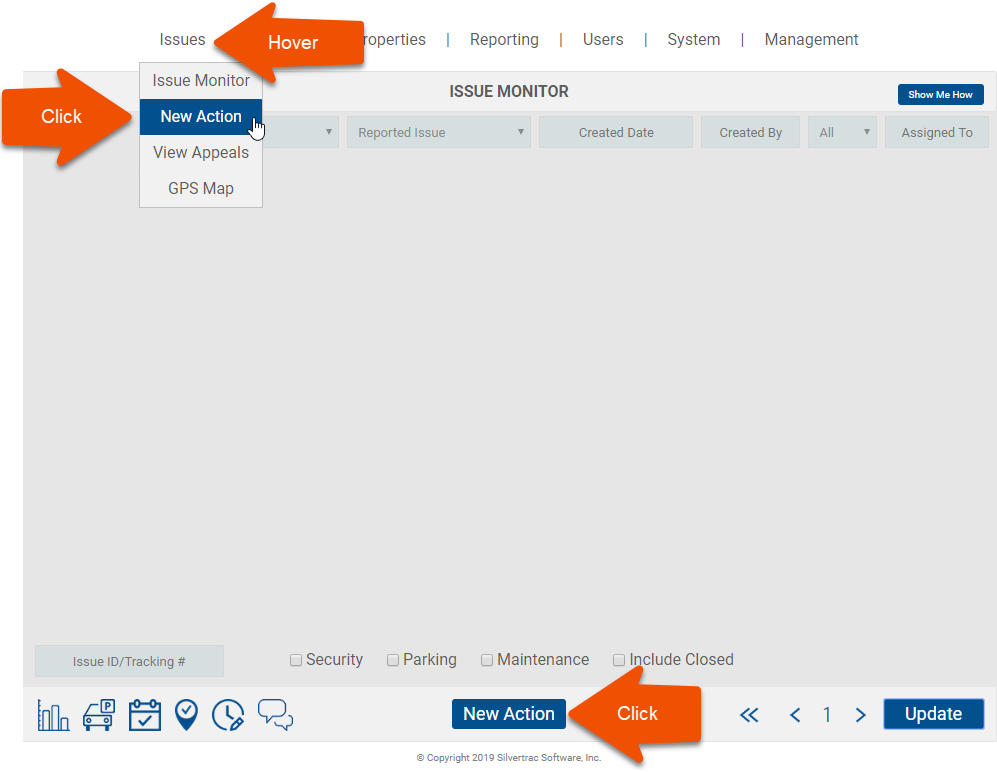
There are two ways to access the New Action feature:
-
Click the blue New Action button at the bottom center of the Issue Monitor.
-
Go to the Issues tab >> click the New Action drop down option

The New Action feature allows a Dispatcher, system Admin and or Supervisor to send Tasks, Assignments, Requests, Reminders and more to field users in real time.
The New Action's assignment, progress, (including the receipt, acknowledgement and completion of Tasks, Assignments, Requests, Reminders, Safety Bulletins and more) can be tracked in the Issue Monitor in real time.
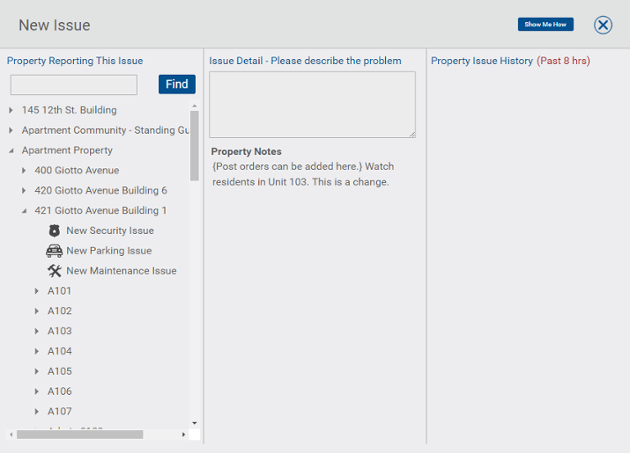
Selecting the New Action feature will open a New Issue page which lists all your active properties on the left hand side of the page under the title: "Property Reporting This Issue".

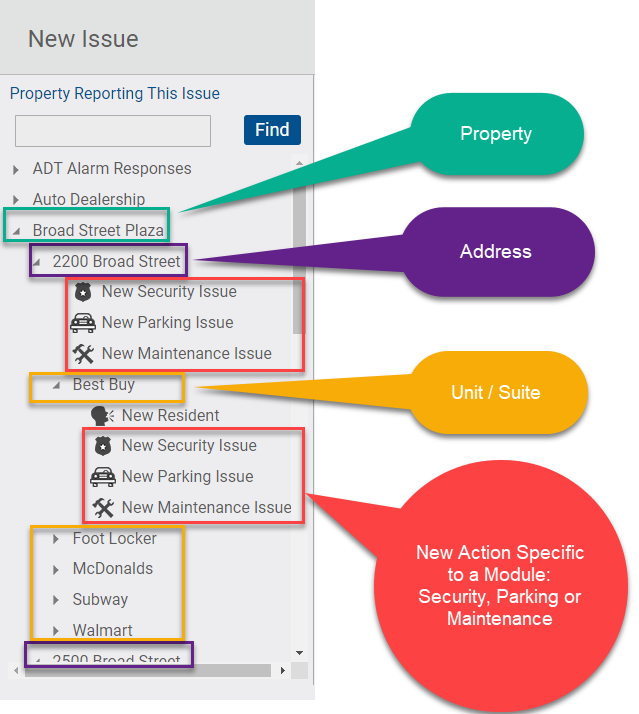
Selecting a specific property will bring up the individual addresses listed for that property and the modules that have been selected to be reported for a specific property.
NOTE: Each property can be set up to receive Reporting for any combination of one, two, or all three modules, Security, Parking or Maintenance. ONLY the modules selected in the Property Profile will show in the drop down.
The dispatcher also has the option to select a Unit or Suite under an address and can select a specific module to report under so that the dispatcher can create an action for Security, Parking or Maintenance. (see example below)

Clicking on a specific Unit or Suite individual Units. Clicking on the appropriate choice will now enable the drop downs in the second column titled Issue Detail – Please describe the issue.
Next, fill in the narrative in the top box. This narrative will appear both on the officer’s handheld device as well as on the DAR.
The first drop down menu is titled Issue Type and allows you to choose the issue type that describes your issue.
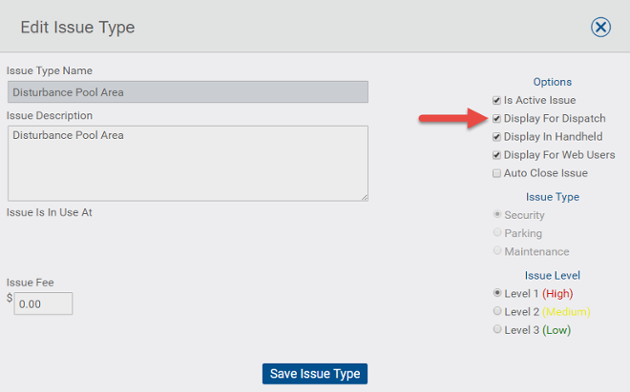
IMPORTANT NOTE: Only issue types assigned to a specific property and with the Display for Dispatch box checked will be displayed in this menu.

If there isn’t an appropriate Issue Type displayed you can easily customize one by going back to the Edit Properties Section and adding it.
The assigned filed user can be assigned to the exact Location of the New Action being created by utilizing the Problem Address, Problem Unit and the Location drop down menus.
The next step in creating a New Action is to select who you want to assign this new action to by clicking Choose.
IMPORTANT NOTE: If you do not select someone to receive this New Action it will automatically be sent to the first person that logs into the account for that property.
The final step in creating a new action is to click the bottom Add Issue button. An auto generated issue number will be assigned and the New Action can be viewed on the Issue Monitor.
The progress of the New Action can now be tracked by viewing the far right column of the issue monitor titled Assigned To.
When it is first assigned it will appear on the Issue Monitor as unacknowledged.
Once the officer acknowledges the New Action the Issue Monitor will reflect a changed status.
When the officer marks himself arrived the Issue Monitor is updated and once again when the New Action is marked closed. The officer also has the ability to add notes, pictures and audio files to the New Action on the handheld.
Once the issue is closed it will be indicated as so on the Issue Monitor.