In this Article we will go over how to use the Reporting Tab to find, pull and sort the data in the report you want to run.
Finding the Report You Want to Run
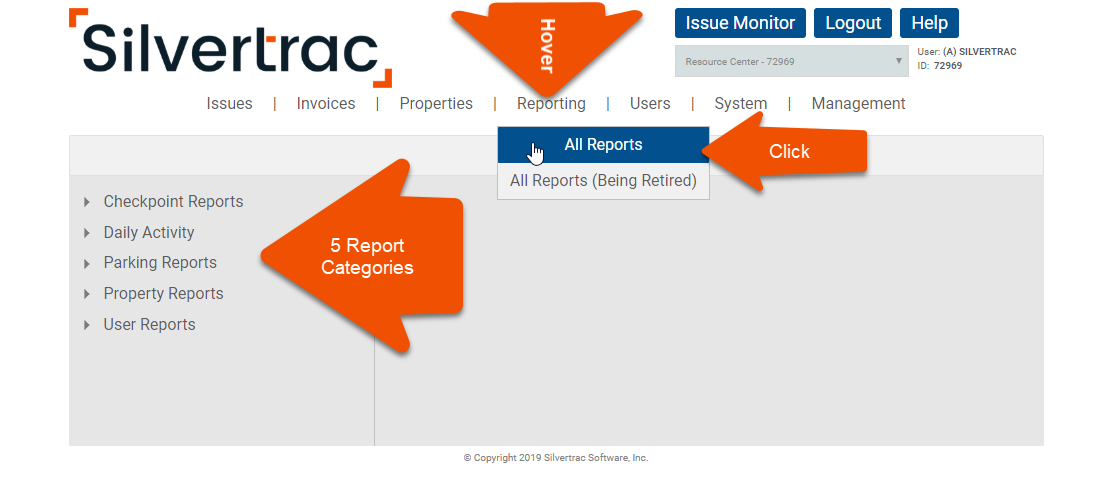
To pull a Report, hover over the "Reporting" Tab >> Click "All Reports" >> you will see 5 different report categories:
Checkpoint Reports
Daily Activity Reports
Parking Reports
Property Reports
User Reports
What is the "All Reports" (Legacy) Option?
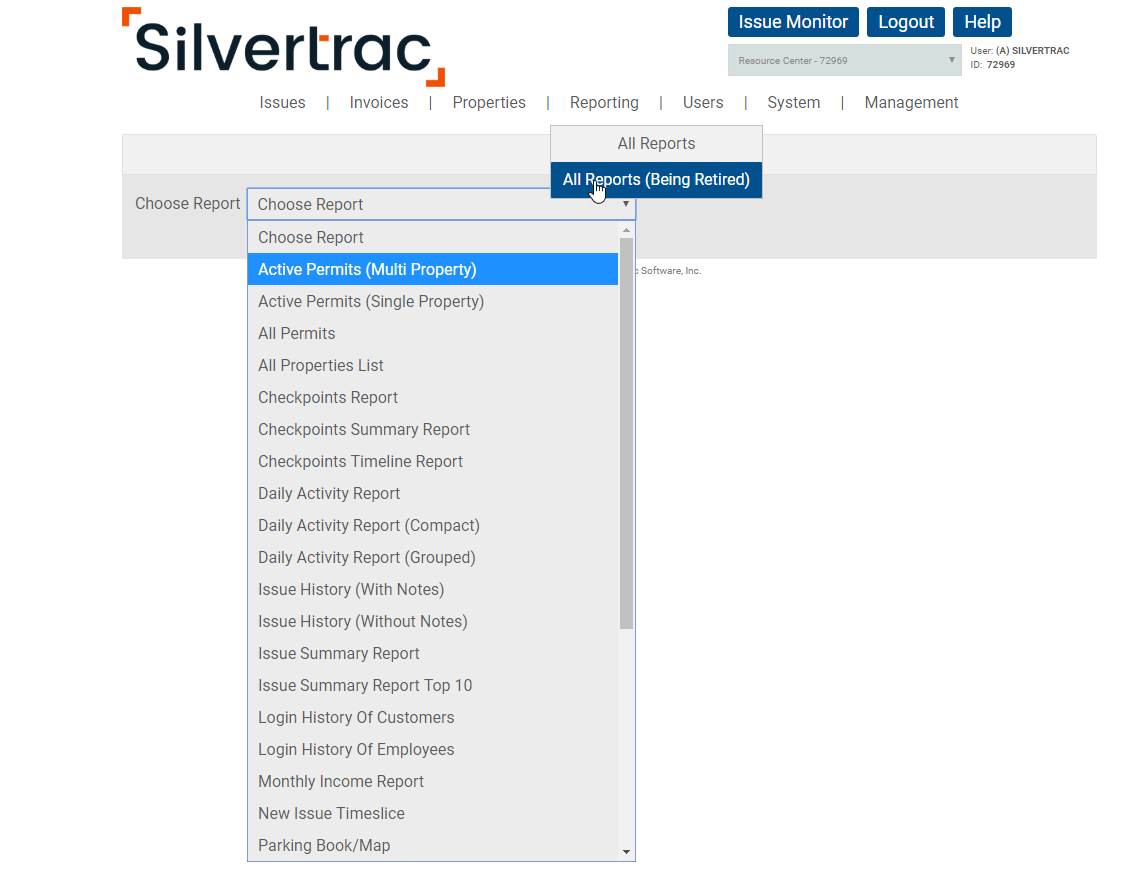
The "Legacy" Reports are the original reporting options. Because of some client preference they have been let remain as an option. Clicking the All Reports (Legacy) option will give a general, un-categorized drop down of these reports in alphabetical order:
How to Run a Report
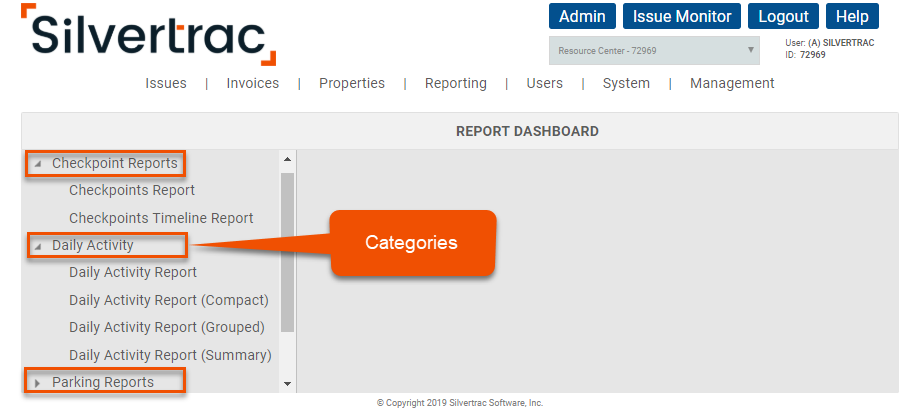
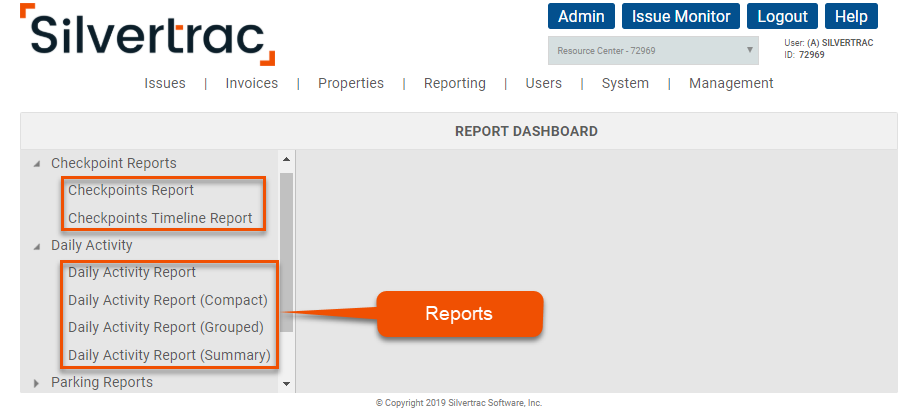
Select the All Reports >> Click on a Report category >> Click on a specific Report
In each Report category a drop down menu will display the specific report types available for you to run under that category.
Once a report is selected a preview of that specific report will be displayed at the bottom left below the report menu as a quick means to verify this is the report you wish to run. This quick peek shows any infographics, photos or charts included.
You also have the option to "Click to View Sample" which will display a view of the Report and also a review of it's purpose, sorting ability, and limits.
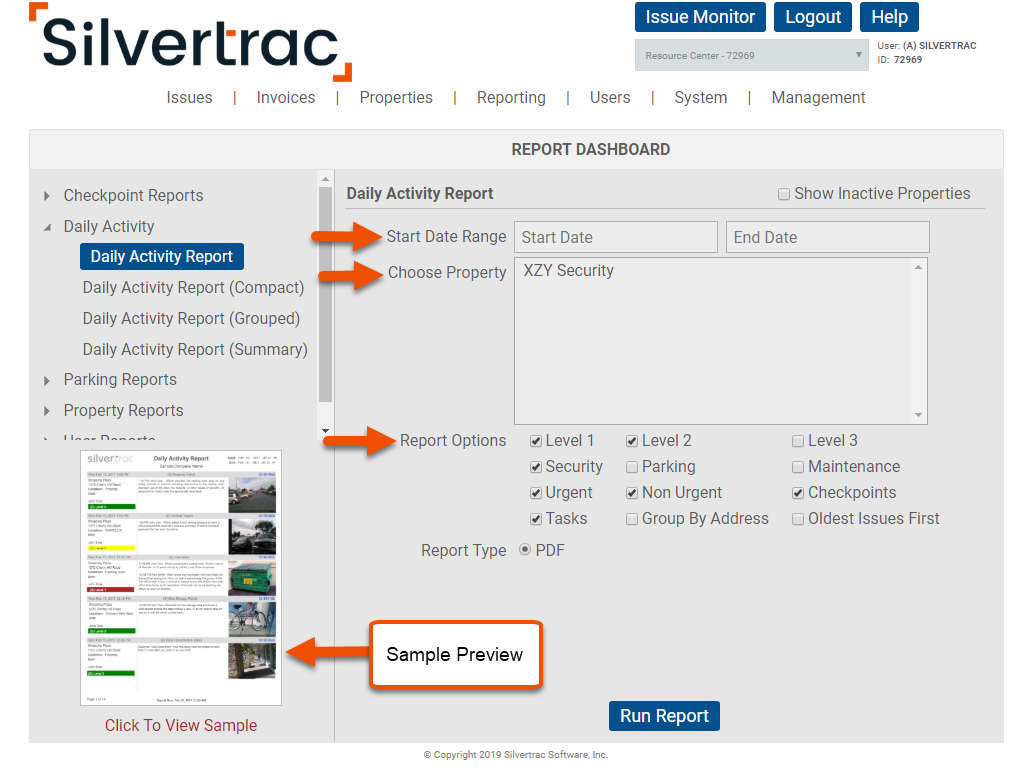
The report parameters typically are outlined with date ranges, report option boxes and drop down menus depending on the type report being run.
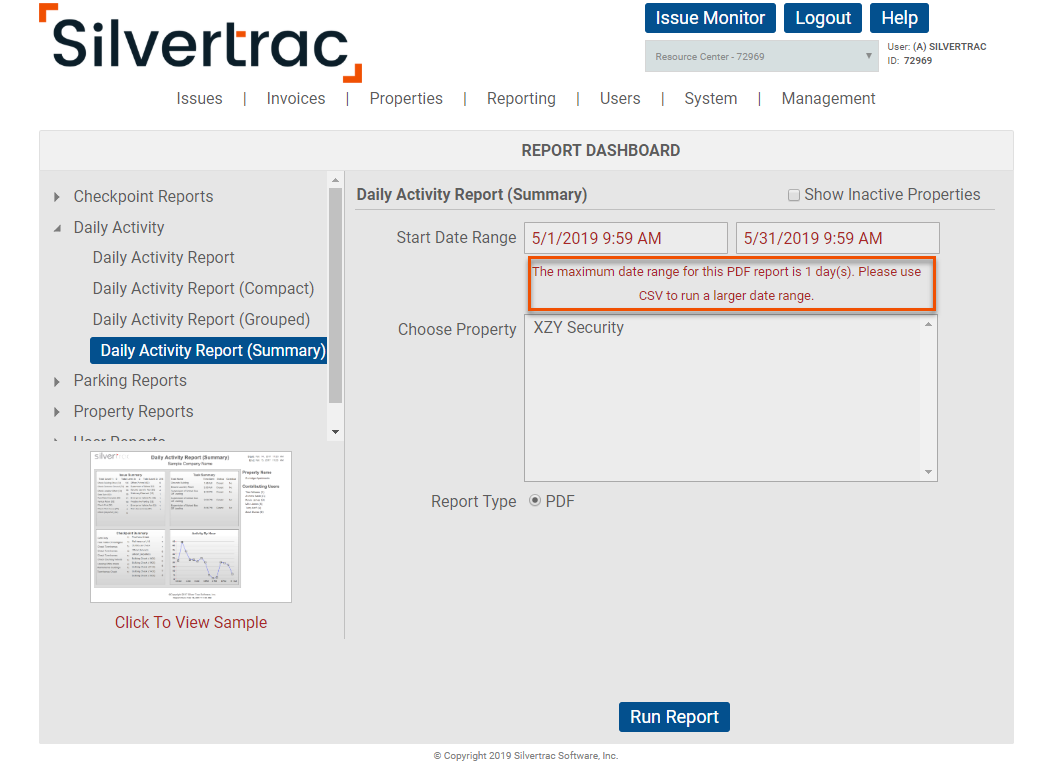
Date range limitations on selected reports, that exceed specified parameters on a specific report, type or format, will pop up in red and note the limitations.
Once the report parameters have been correctly entered, select the blue Run Report box at the bottom of the page and your report will automatically download as a PDF or CSV file.